
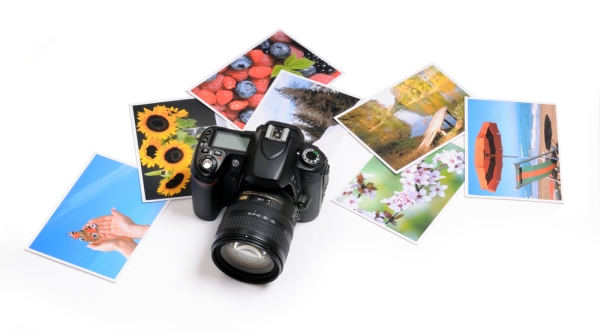
 The interesting thing about modern digital cameras is that most of them will be able to capture images in high quality. They have enough pixels to make most images look good. However, despite this great quality of digital images, the printed photos don’t turn out to be too good.
This happens especially when people print their photos at home with a photo printer. Photo printers of today are highly advanced and can print photos at lab level quality. So, why is it that most of our photos that look good on the screen, turn out to be horrendous on the photo paper?
The reason is simply that we haven’t learned how to handle our photo printers. While there is a lot to learn about photography, photo editing, and photo printing to achieve the professional levels of quality, just getting your photos printed right doesn’t take much.
In fact, you just need to keep a few things in mind while printing your photos and you can ensure decent quality prints. Here are nine tips designed to help you get the best out of your photo printer.
Evaluate Different Types of Photo Paper
 When it comes to the quality of your printed photo, four things play a role – the quality of the digital image, the printer technology, the type of ink, and the kind of photo paper.
Debatably, the most important of these is the kind of photo paper you use.
You can have a great digital image, good ink, and a good printer but if you use the wrong type of photo paper, then your final print will not look good.
In essence, the better the quality of photo paper you use in your photo printer, the better the final picture will be. However, it’s also worth remembering that as you go up the ladder of photo paper quality, you’ll also have to shell out more.
So, if you plan on framing and hanging the photo in your living room, then by all means use highest quality paper possible. On the other hand, if the purpose is just to convey an idea to someone informally, normal paper may be a better option.
Consider Direct Printing Options
There are multiple ways of printing images from your camera. You can copy the same to your computer and print from there, print via Bluetooth, print through USB connection, and even print wirelessly.
Each of these options will yield different results with the same file. In fact, if you have more than one option available to you, we suggest trying them out and comparing the results.
This will be especially useful for you if you don’t know or don’t have the time to tinker with photo editing software programmes.
Preview Your Photos before Printing
 Direct printing options can not only yield better results but also save time and effort. On the flip side though, direct printing options will result in greater errors.
You will end up printing images that you didn’t want in the first place. You may even end up printing stuff that comes out wrong.
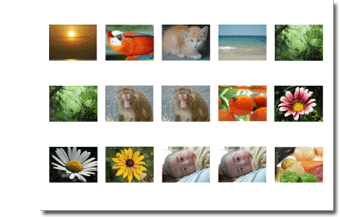
This is why, if you’re using direct printing techniques, you should make sure to get an index print sheet first.
The thumbnails on the index print sheet will give you a good idea about what you want to print and what you don’t.
In fact, you should get an index print sheet every time a new element is added to the printing process. For instance, you should check index print sheets if you add new cartridges, new paper, new printer settings, and even new source of images.
Fix the Settings of Your Printer
Printing is a precise process and photo printing is even more precise. Your printer uses precision technology to make sure that the right colours and shades are used for your photo. This precision technology can be modified for a number of applications.
First and foremost, your printer settings can be changed to suit different types of photo papers and printing ink. This is, by far, the most important setting and must be checked every time you change your cartridges or start using a new brand or type of photo paper.
In addition to this, another printer setting you should focus on is resolution. This setting would usually be represented in Dots per Inch or DPI. This unit defines the clarity and sharpness of the photo you’re printing. The higher it is, the better your final print will be. Always keep this above 300 DPI, unless you’re looking for low quality images.
Keep the Paper Clean Before and After Printing
 Photo paper is very sensitive. Before printing when you’re putting it in place, you need to remember certain things.
The first is that you should know which side you should keep up. Photo paper is not like normal paper that can be printed on both sides.
If you print your photo on the wrong side of the photo paper, then the colour won’t take hold as it should. This will result in poor quality photos.
Secondly, you have to make sure that the photo paper is clean. You can’t print a photo on a leaf that has your fingerprints on it because you touched it with dirty hands.
Similarly, after the photo printer has done its job, you can really handle the leaf freely. You need to quickly and lightly pick it up and put it somewhere to dry. If you don’t do this, then the final print quality will suffer through smudging or even fading.
Choose PC Editing Over Inbuilt Editing
 Most photo printers come with internal editing software programmes. These inbuilt photo editing software tools can either be simple or complex.
The simplest ones will allow you to at least crop your image while the advanced ones will allow modifications to red, green, and blue levels along with brightness and contrast.
If you plan on using these tools a lot, then we recommend test running them by printing multiple photos on your photo printer.
However, if you can, then we will advise you to invest a little time in learning how to play with some PC installed photo editing software programme.
Editing photos on these software programmes will yield vastly better results than doing the same through your photo printer’s inbuilt software tools. While editing your images on such programmes, there are two cardinal mistakes that you need to avoid.
Most people interested in photography and with some photo editing skills know these two mistakes but amateurs make them far too often than they should.
The first of these is that you should never begin editing the original file of the photograph. Instead, you should copy the image before you start editing it. The original photo has the best quality. Keeping it safe will give you a chance to return to it if you mess up.
The second mistake is saving images in file formats that involve compression like JPEG. Every time you save a photo to this extension, you’re compressing the file and every time you open it to edit, you decompress it.
More importantly, every instance of compression or decompression causes a certain loss of quality. So, it’s better to save your photos in other file formats where compression – decompression loss doesn’t occur.
If you can keep these things in mind, then it won’t take you long to start getting the best out of your photo printer.